DIY motorized blinds are an excellent solution for homeowners looking to add convenience, style, and energy efficiency to their homes. Whether you’re installing motorized shades for the first time or replacing old ones, this guide will help you understand the benefits and provide a step-by-step guide to installation. With the right tools and the right approach, you can enjoy the ease of automated window treatments that suit your lifestyle.
The Benefits of Installing DIY Automatic Blinds in Your Home
Installing DIY automatic blinds comes with numerous benefits. One of the primary advantages is the ability to control the amount of natural light entering your home. Motorized shades can be programmed to open and close at specific times of day, ensuring that your home stays well-lit and comfortable all day long.
In addition to light control, motorized blinds offer improved privacy. You can set your blinds to automatically close at night or when you’re away, ensuring that prying eyes can’t see into your home. This is especially important for bedrooms and bathrooms, where privacy is essential.
Finally, these blinds are energy-efficient. By controlling the amount of sunlight that enters your home, motorized shades can help keep your home cooler in the summer and warmer in the winter. This can lower your energy bills over time.
How DIY Motorized Window Shades Can Transform Your Living Space
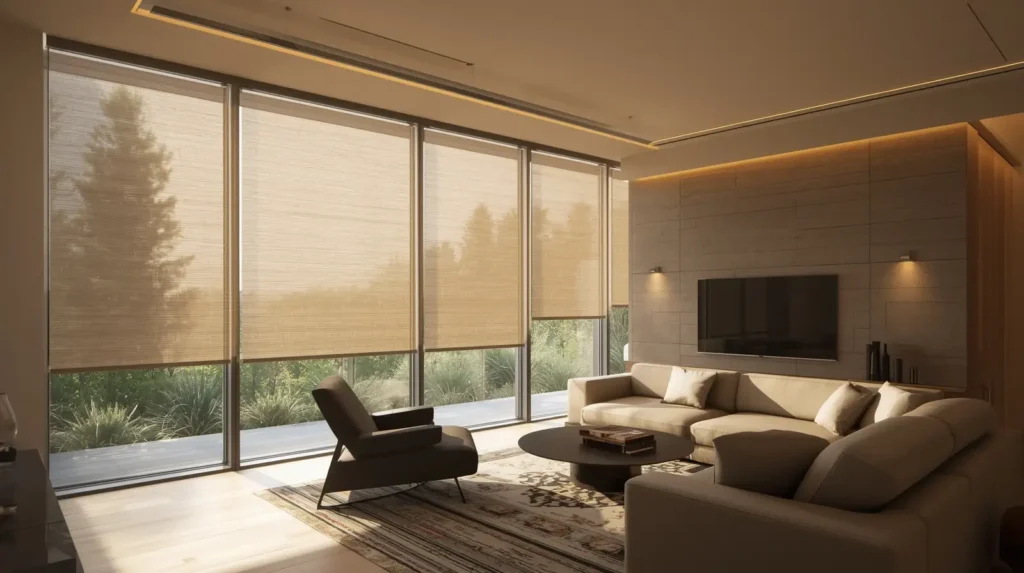
DIY motorized window shades don’t just improve the functionality of your home they can also enhance its aesthetic. Modern, sleek motorized shades come in a variety of styles, colors, and fabrics to complement any décor.
Imagine controlling the lighting in your living room with just a tap on your phone. It adds a sense of luxury and convenience that traditional manual blinds can’t match. With the ability to create a soft, diffused light or darken your space at the touch of a button, DIY motorized window shades allow you to create the perfect atmosphere in every room.
Essential Tools and Materials You’ll Need for DIY Motorized Blinds
Before starting your DIY project, it’s important to have the right tools and materials. Here’s a list of what you’ll need:
-
DIY motorized blinds kit – This kit should include the blinds, motors, brackets, and remotes.
-
Screwdriver – To mount the motorized blinds and secure them in place.
-
Measuring tape – Accurate measurements are essential to ensure a perfect fit.
-
Power drill – You may need to drill holes for the brackets or mounting hardware.
-
Smartphone or tablet – To connect your motorized blinds to an app if your kit supports smart technology.
With these materials in hand, you’ll be ready to start installing your new motorized blinds.
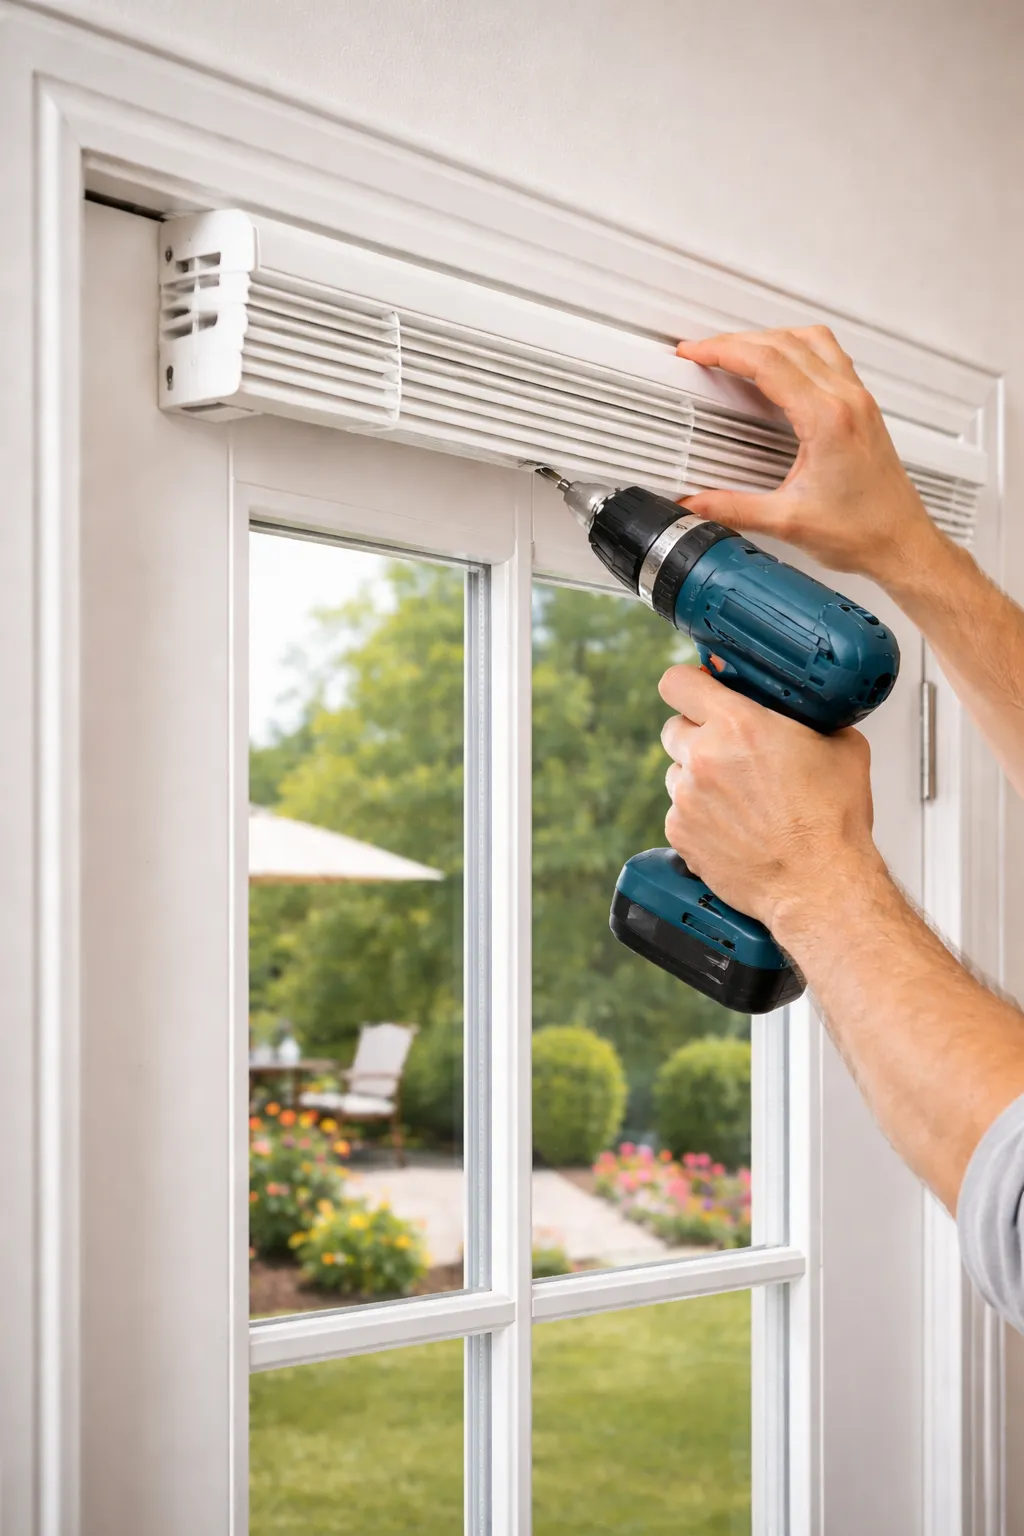
Step-by-Step Guide to Installing DIY Motorized Blinds
Now that you have everything you need, let’s dive into the step-by-step process of installing DIY motorized blinds. Follow these simple steps to get your new blinds up and running:
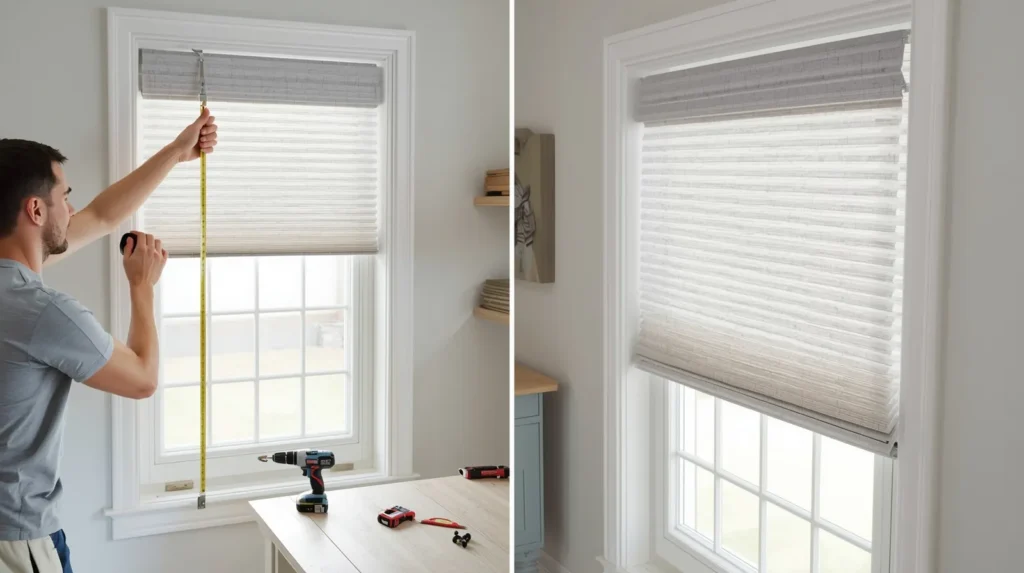
Measure Your Windows:
Take precise measurements of your window to ensure that the motorized blinds fit correctly.
Install the Brackets:
Use a screwdriver and drill to install the brackets that will hold the blinds. Make sure they are level for a neat appearance.
Attach the Blinds to the Brackets:
Secure the blinds to the mounted brackets, following the instructions provided in your DIY kit.
Install the Motor:
Connect the motor to the blinds. This step may vary depending on the motor type in your kit, but usually, it involves attaching the motor to the top of the blinds and connecting it to the power source.
Sync with the Remote or App:
Once the motor is installed, sync the blinds with your remote or app for easy control.
Test the Motorized Blinds:
Test the blinds by opening and closing them using the remote or app to make sure everything works as expected.
Congratulations! You’ve successfully installed your DIY motorized blinds.
Understanding the Types of Motorized Blinds: Which One Is Right for You?
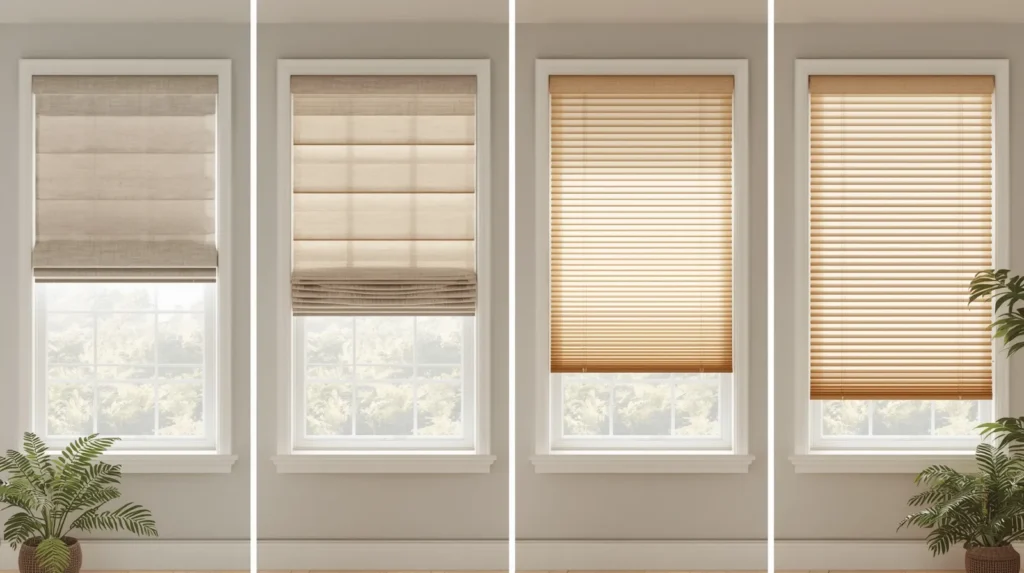
There are several types of motorized blinds to choose from, each offering its own set of features. Let’s take a look at some of the most popular options:
-
Roller shades – These are simple and sleek, providing a modern look while blocking out light efficiently.
-
Roman shades – If you’re looking for a softer, more luxurious look, Roman shades are a great option.
-
Cellular shades – These shades offer superior insulation and are ideal for energy efficiency.
-
Venetian blinds – These horizontal slats are perfect for controlling light while maintaining privacy.
Depending on your needs and the style of your home, one of these options will be the perfect fit.
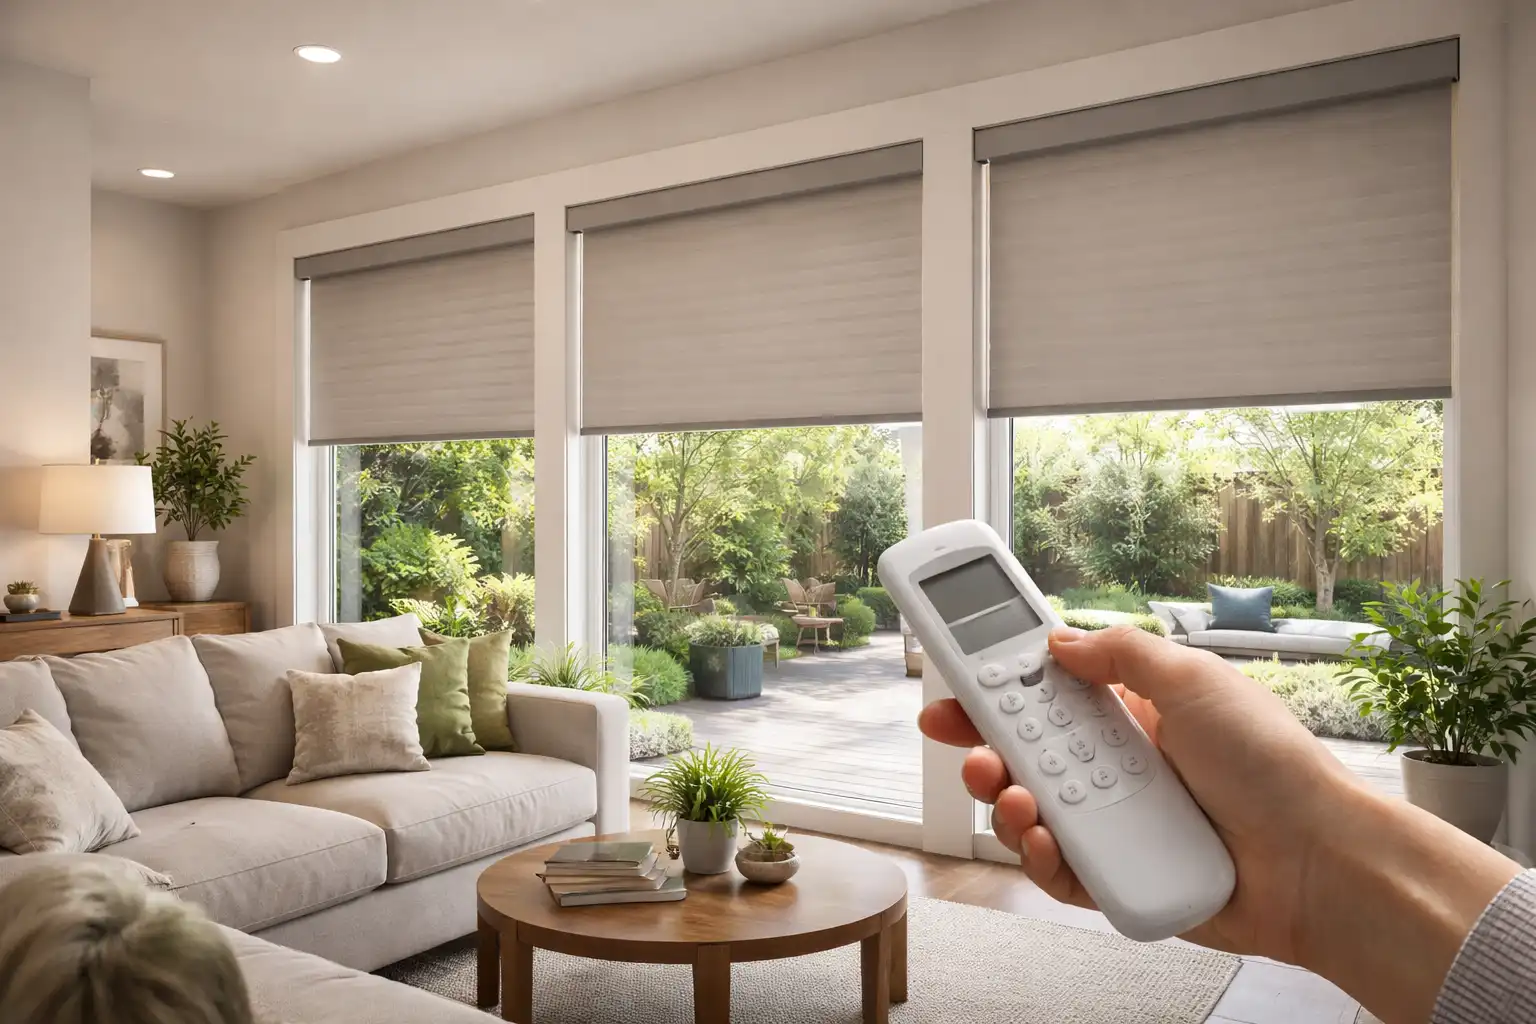
How DIY Smart Blinds Work and Why They’re a Game-Changer
DIY smart blinds are the next step in home automation. These blinds allow you to control them with your smartphone, tablet, or even your voice. If you already have smart devices in your home, like Amazon Alexa or Google Home, DIY smart blinds can easily integrate into your existing setup.
With smart blinds, you can automate your window treatments to open and close based on your schedule, adjust for optimal energy savings, or control them remotely when you’re away from home. The convenience of having blinds that adjust to your needs with minimal effort is truly a game-changer.
Choosing the Right DIY Auto Blinds for Your Home’s Style and Needs
When choosing the right DIY auto blinds, you need to consider both style and functionality. Think about the amount of natural light you want to control, as well as your room’s aesthetic. For example, if you’re looking for a more traditional look, Roman shades may be the best choice. If you prefer a more modern, streamlined appearance, roller shades may be the way to go.
Additionally, consider your home’s insulation needs. Cellular shades are ideal for keeping your home energy-efficient, while Venetian blinds are great for flexible light control.
Common Mistakes to Avoid When Installing DIY Motorized Shades
While DIY motorized shades are easy to install, there are a few common mistakes that you’ll want to avoid:
-
Incorrect measurements: Always measure your window frame carefully to ensure that the blinds fit correctly.
-
Not securing the brackets properly: If the brackets aren’t installed securely, your motorized blinds may not work as intended.
-
Overloading the motor: Be sure to follow the weight capacity guidelines for your motorized blinds to avoid damage.
Taking the time to avoid these mistakes will ensure a smooth installation process.
Why US Shutters and Blinds is Your Go-To for DIY Motorized Blinds in Irvine, CA
At US Shutters and Blinds, we specialize in providing high-quality motorized blinds for homes in Irvine, CA. Whether you’re looking for DIY kits, custom designs, or expert advice, we’re here to help you make the most of your window treatments. Our team is dedicated to providing top-notch products and customer service that meets the needs of every homeowner.
With our expert guidance and a wide selection of motorized blinds, you can enjoy the perfect balance of style, function, and convenience. We’ve been trusted by countless homeowners in Irvine to deliver high-quality window treatments that improve the comfort and efficiency of their homes.
Get Started Today: Transform Your Home with DIY Motorized Blinds
Ready to transform your home with DIY motorized blinds? Contact US Shutters and Blinds today to explore our wide selection of motorized window treatments. Whether you’re looking for roller shades, smart blinds, or any other style, we have the perfect solution for you.
Start enjoying the convenience, style, and energy savings that come with automated blinds. Call us now to learn more and get started with your DIY project today!