Understanding Cellular Blinds and How They Work
Cellular blinds, sometimes called honeycomb shades, are one of the most popular window treatments in homes today. Their design features a fabric that folds into crisp pleats, creating small pockets of air — these “cells” act like insulation, helping regulate room temperature. The blinds are lightweight but sturdy, making them both practical and stylish.
Before learning how to remove cellular blinds from window, it helps to know the parts you’ll be working with. A standard setup includes the headrail, which is the solid piece at the top that holds everything together. Inside or outside the headrail are the mounting brackets these are fixed to the window frame or wall and hold the blinds in place. The fabric shade hangs below the headrail and moves up or down when you operate the lift mechanism.
Knowing how these parts connect is important because the removal process depends on how your blinds were installed. Corded, cordless, and motorized versions all share similar components but may have slightly different release methods. Understanding these differences will save you time and prevent unnecessary damage.
Reasons You Might Need to Remove Cellular Blinds
There are many situations where removing cellular shades becomes necessary. One of the most common is cleaning while you can dust them in place, a deep wash or spot-cleaning often requires taking them down. Another reason is repair. If your blinds have broken cords, worn fabric, or damaged hardware, it’s easier to fix them once they’re removed from the window.
You might also remove them during a home renovation. Painting, replacing trim, or installing new windows often requires removing all window treatments temporarily. Some homeowners take them down to replace them with a new style or different color to match updated décor.
In certain cases, removing honeycomb blinds is part of seasonal maintenance. For example, if you use heavier drapes in the winter, you might store your cellular shades until warmer months. And sometimes, you simply need better access to the glass for repairs, sealing drafts, or replacing window panes.
Preparing for the Removal Process
Before you begin, take a few minutes to prepare. The right tools and setup can make the job faster, safer, and less frustrating.
Tools you might need:
-
A flathead screwdriver or butter knife (for releasing brackets)
-
A small step stool or ladder for hard-to-reach windows
-
A soft cloth to protect delicate surfaces
-
A container to hold small screws or clips if your blinds have them
Make sure the area around the window is clear. Move furniture away and remove any decorative items from the sill. Open the blinds fully so the fabric stacks neatly at the top this will keep it out of your way and reduce the risk of creasing or tearing.
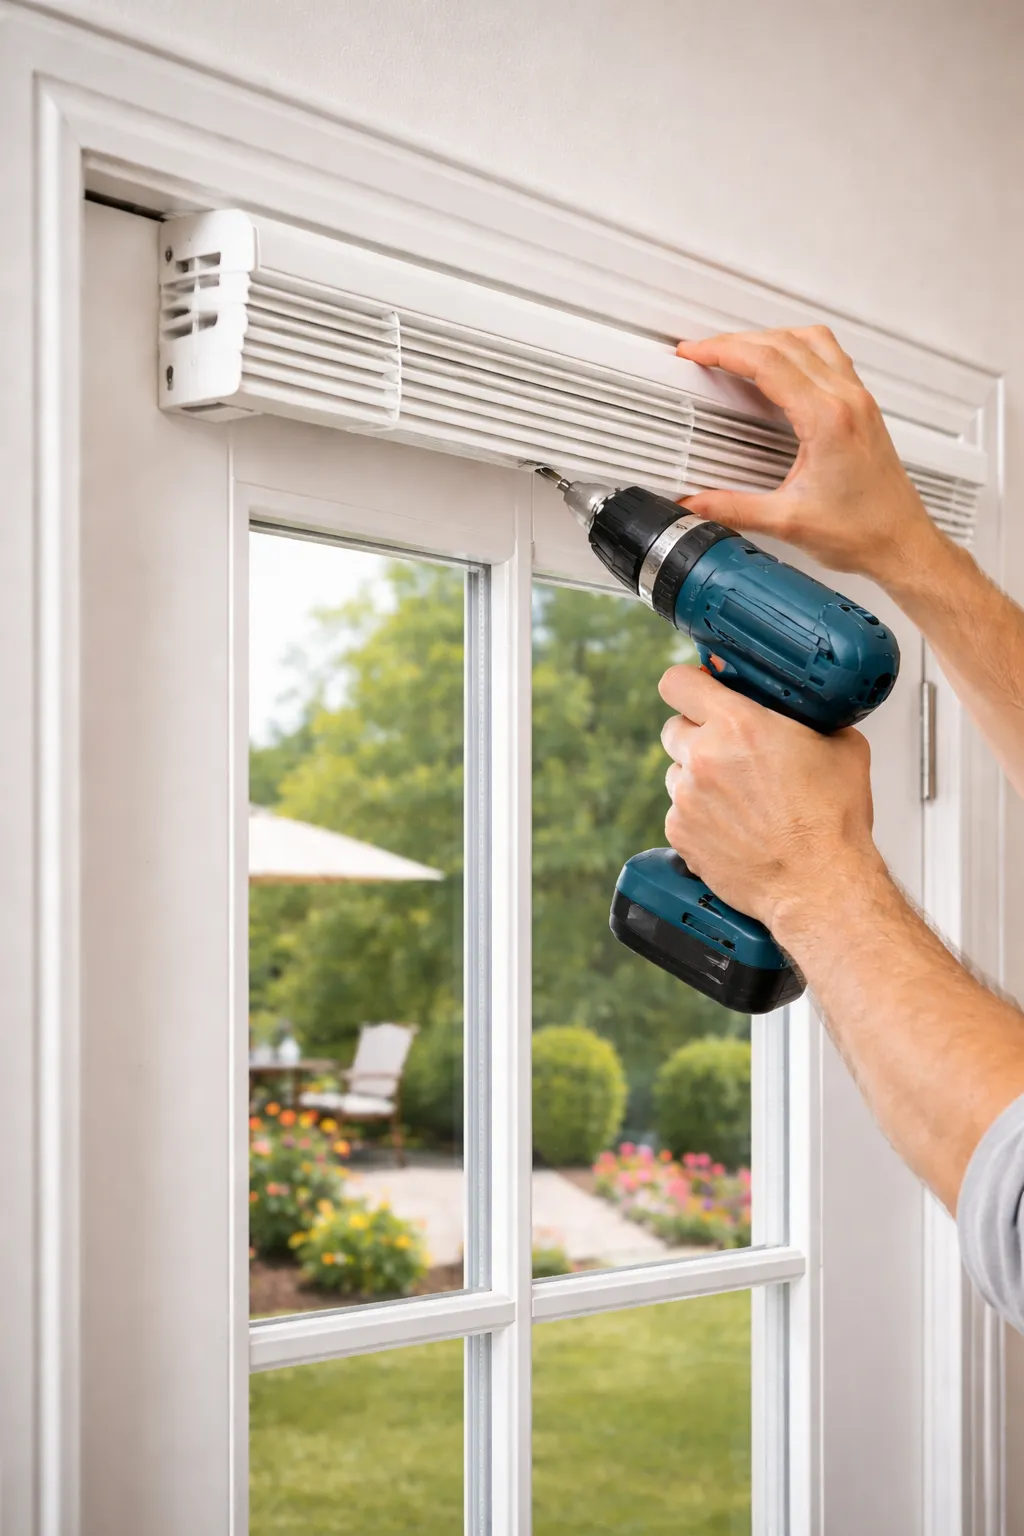
Before you touch the brackets, it’s helpful to identify the type. Some cellular shades use visible metal or plastic clips, while others have hidden brackets. Understanding how to remove shades from brackets without forcing them is the key to avoiding damage. Take a few seconds to inspect your headrail and find the release points before starting.
How to Remove Cellular Blinds from Window – Step-by-Step Overview
The process can be done in a few simple steps, but moving slowly and carefully will protect both your blinds and the window frame.
Step 1 – Raise the blinds completely
This makes the headrail easier to handle and prevents fabric damage.
Step 2 – Locate the mounting brackets
These are usually at both ends of the headrail and sometimes in the middle for larger blinds.
Step 3 – Release the bracket mechanism
For most designs, you’ll press a tab, pull a lever, or gently insert a screwdriver between the headrail and bracket to release the lock.
Step 4 – Tilt and lift the headrail
Once the brackets are open, tilt the headrail forward and lift it upward to remove it from the bracket hooks.
Step 5 – Store or clean as needed
Lay the blinds on a clean surface or hang them in a safe place until you’re ready to reinstall or replace them.
When done correctly, removing cellular blinds is quick and doesn’t require a lot of force. If you feel resistance, double-check the bracket release forcing it could bend the hardware or damage the headrail.
Removing Cellular Shades from Mounting Brackets
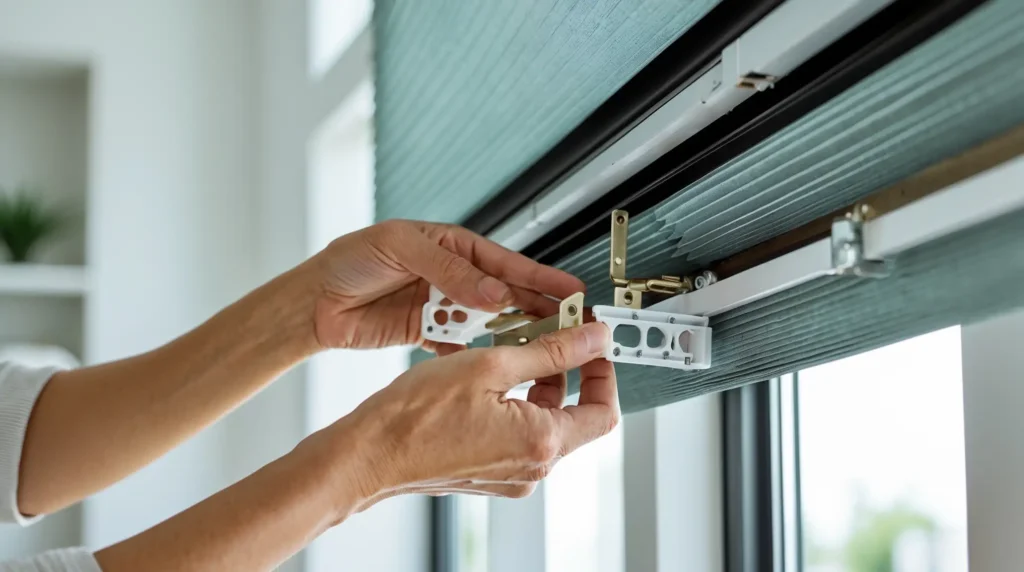
Standard mounting brackets for cellular shades are small but strong. They are usually made of metal or heavy-duty plastic and have a locking mechanism to hold the headrail securely.
To remove cellular shades from mounting brackets, look for the small tab or latch. It’s often on the front or bottom of the bracket. Using your fingers or a flat tool, press or lift the tab to release the headrail.
If the brackets are top-mounted (attached to the top of the window frame), you may need to push the headrail backward slightly before lifting it out. For side-mounted brackets, the release point is usually on the side facing the room.
One important tip is to support the headrail with one hand while releasing the bracket with the other. This prevents it from falling suddenly, which could damage the blinds or scratch your window sill.
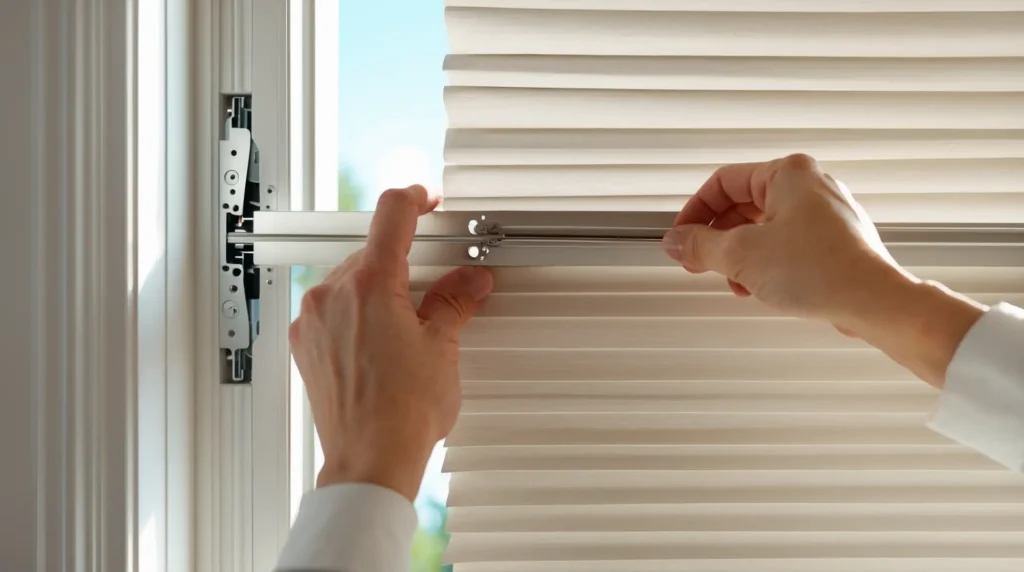
How to Remove Cordless Cellular Shades from Bracket
Cordless cellular shades have an internal spring system instead of visible lift cords. While they operate differently, the removal method is often similar to standard blinds.
First, raise the shade fully so the fabric is compacted. This will make it lighter and easier to handle. Then, locate the brackets. Cordless models often have a discreet release tab either inside the bracket or underneath it.
Press the tab with your finger or a flat tool while gently pulling the headrail forward. If you encounter resistance, check both ends — sometimes one bracket releases before the other, and you need to press both at the same time.
When removing cordless blinds, be careful not to touch or twist the internal mechanism. Damaging the spring system can affect how well the blinds operate if you plan to reinstall them later.
Removing Honeycomb Blinds and Shades with Hidden Brackets
Hidden brackets are designed for a sleek appearance they’re less noticeable but can be trickier to open if you’ve never worked with them before.
Start by examining the headrail closely. You might see a small gap between the headrail and bracket where a release latch is located. Insert a thin, flat tool like a screwdriver and gently push until you feel the bracket release.
Once the first bracket is free, tilt the headrail down and slide it out of the other bracket. If your blinds have three or more brackets, work from one end to the other rather than trying to release all at once.
Removing honeycomb blinds from hidden brackets takes patience. Work slowly to avoid bending the headrail or scratching the paint on your window frame.
How to Take Down Accordion Blinds and Similar Styles
Accordion blinds are similar to honeycomb shades but have wider folds and sometimes different materials. The removal process, however, follows the same general steps.
First, lift the blinds fully to protect the pleats. Locate the brackets and look for a release mechanism this might be a tab, lever, or spring clip.
Press or pull the release and tilt the headrail out of the brackets. If the blinds are large, it’s best to have someone help hold one side while you work on the other. This will prevent uneven pressure on the hardware.
After removal, fold accordion blinds gently and store them flat or upright to avoid creasing.
Understanding Honeycomb Shade Brackets and Mounting Systems
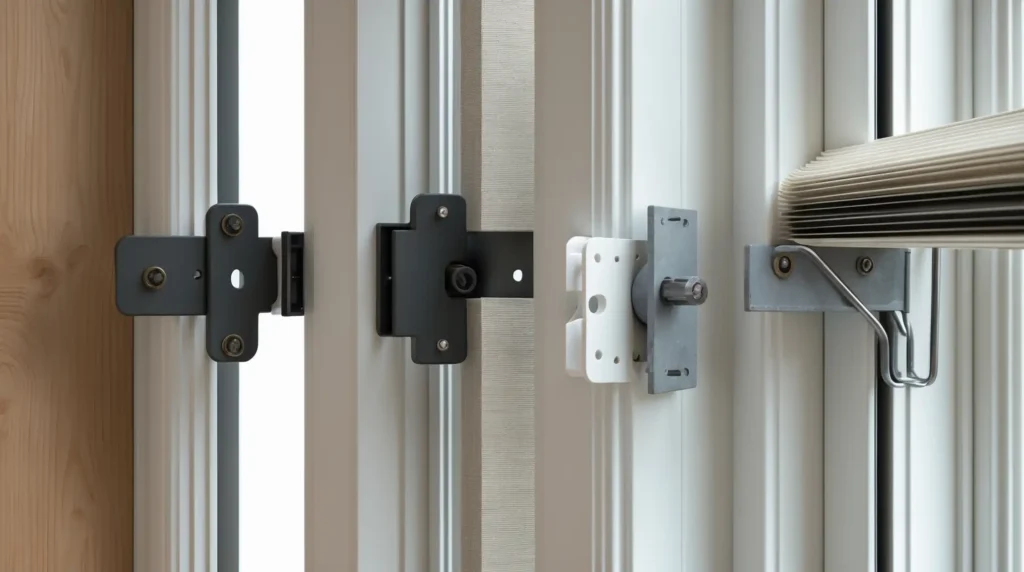
Honeycomb shade brackets come in a few common styles:
-
Top-mount brackets – Screwed into the top of the window frame or ceiling.
-
Side-mount brackets – Fixed to the side walls of the window opening.
-
Spring-loaded brackets – Hold the headrail with tension and release when pressed.
Each bracket type has its own removal method. Top-mounts often require pushing the headrail backward before lifting it out. Side-mounts usually have a front-facing release tab. Spring-loaded systems need you to press down or inward on the headrail until it pops free.
Knowing your bracket style before starting makes the job much smoother and prevents accidental damage.
Tips for Taking Down Shades Without Causing Damage in Irvine, CA
When removing blinds with hidden brackets or standard mounts, patience is key. Always release the locking mechanism before applying any force. If the bracket feels stuck, gently wiggle the headrail instead of yanking it.
Use a step stool for high windows so you can work comfortably at eye level. Protect painted or stained surfaces by placing a cloth between your tool and the window frame.
If your shades are older, the plastic parts might be brittle. Pressing too hard could cause them to crack. In those cases, it’s better to work slowly or ask for professional assistance.
When to Call a Professional Like US Shutters and Blinds
While most blinds can be removed with basic tools and a little patience, some situations call for expert help. Large, heavy, or motorized blinds require more care and sometimes specialized equipment.
If your blinds are mounted high above the floor or in hard-to-reach areas, it’s safer to have professionals handle the job. This also applies if your blinds are part of a complex system, like top-down/bottom-up shades or multi-panel installations.
US Shutters and Blinds can handle removal, cleaning, repair, or replacement with the right tools and techniques. This ensures your blinds and windows remain in perfect condition, ready for their next use or upgrade.
Removing window coverings is simple when you know the right steps. If you’re not confident, let US Shutters and Blinds handle the work for you quickly and safely.